
We strongly encourage users to use Package manager for sharing their code on Libstock website, because it boosts your efficiency and leaves the end user with no room for error. [more info]

Rating:
Author: MIKROE
Last Updated: 2014-07-31
Package Version: 1.0.0.0
Category: Audio & Speech
Downloaded: 1355 times
Not followed.
License: MIT license
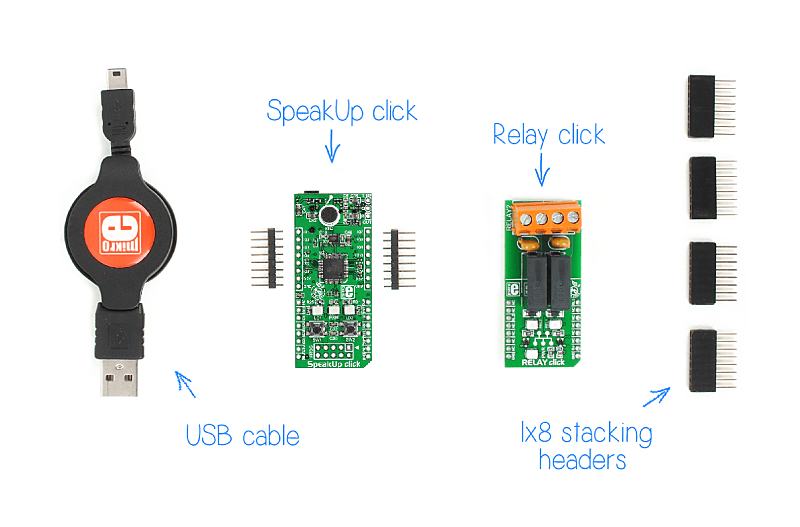
This simple how-to, shows you how to make voice activated switch with help of SpeakUP click (in standalone mode) and Relay click.
Do you want to subscribe in order to receive notifications regarding "Let's make - Voice Controlled Lights" changes.
Do you want to unsubscribe in order to stop receiving notifications regarding "Let's make - Voice Controlled Lights" changes.
Do you want to report abuse regarding "Let's make - Voice Controlled Lights".
| DOWNLOAD LINK | RELATED COMPILER | CONTAINS |
|---|---|---|
| 1406819088_let_s_make___voi_other_other.zip [29.17KB] | Other Compiler |
|

SpeakUP in standalone mode and Relay click is all that you need.
View full imageHow many times have you stubbed your toe on a piece of furniture while looking for a light-switch in a dark room? Let's make that switch voice controlled.
The great thing about SpeakUp click is that it works as a standalone device because it has an STM32 ARM® Cortex®-M4 MCU on it.
To use it as a light switch, or as an electrical switch for any other appliance, you just have to combine it with a relay click. It will take 15 minutes to set it all up. It's ridiculously easy.
You can download the free software tool for configuring your SpeakUp from this link:
The instructions for recording commands for this project are in the video, but you can go here for a general guide on how the software works:
!!WARNING!!
Hazardous voltages in electrical equipment can cause severe personal injury or death.
This project includes a relay click which has some exposed components that may be connected to hazardous line voltages.Take extreme care to protect against shock.
Do not touch the board while the power supply is on.
Always work with another person in case an emergency occurs.
How many times have you stubbed your toe on a piece of furniture while looking for a light-switch in a dark room? Let's make that switch voice controlled. The great thing about SpeakUp click is that it works as a standalone device because it has an STM32
Watch on YouTube


