We strongly encourage users to use Package manager for sharing their code on Libstock website, because it boosts your efficiency and leaves the end user with no room for error. [more info]

Rating:
Author: MIKROE
Last Updated: 2019-01-10
Package Version: 1.0.0.1
mikroSDK Library: 1.0.0.0
Category: Haptic
Downloaded: 5781 times
Followed by: 6 users
License: MIT license
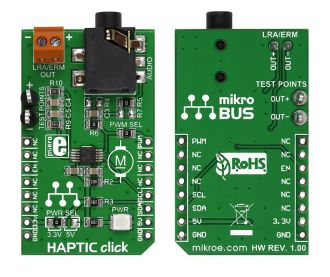
Haptic click carries a Haptic Driver for ERM and LRA vibration motors.
The board carries screw terminals for connecting said motors,
as well as an audio interface (3.5mm jack).
Haptic click communicates with the target MCU through mikroBUSâ„¢ I2C (SCL, SDA), EN (CS) and PWM pins. The board is designed to use either a 3.3V or 5V power supply.
Do you want to subscribe in order to receive notifications regarding "Haptic click" changes.
Do you want to unsubscribe in order to stop receiving notifications regarding "Haptic click" changes.
Do you want to report abuse regarding "Haptic click".

Front and back view of the Color2 Click Board designed in mikroBUS form factor.
View full imageLibrary Description
The library covers all the necessary functions to control Haptic Click board.
Library have drivers for generic write and read, for enable/diasble the device,
sets desired mode function, resets all register, for getting status,
sets the desired library of vibrating patterns to read, starts reading the desired pattern and moving the motor function, etc.
Key functions:
void haptic_enable() - Enable the device function.void haptic_setMode( uint8_t selMode )- Sets the Haptic click to desired mode function.void haptic_startMotor() - Starts reading the desired pattern and moving the motor function.Examples description
The application is composed of three sections :
- System Initialization - Initializes GPIO, I2C and LOG structures,
sets CS and PWM pins as output.
- Application Initialization - Initialization driver enable's - I2C,
first, we enable the device, set soft reset, set calibrating and start the engine.
After that, we set Audio-to-Vibe mode, Minimum Input level ( ~ 1.35V ),
enable AC coupling, select input mode for Analog input and start write log.
- Application Task - (code snippet) This is a example which demonstrates the use of Haptic Click board.
Results are being sent to the Usart Terminal where you can track their changes.
void applicationTask()
{
    if ( startStatus )
        mikrobus_logWrite( " START ", _LOG_LINE );

    startStatus = 0;
}
Other mikroE Libraries used in the example:
I2CUARTAdditional notes and information
Depending on the development board you are using, you may need USB UART click, USB UART 2 click or RS232 click to connect to your PC, for development systems with no UART to USB interface available on the board. The terminal available in all MikroElektronika compilers, or any other terminal application of your choice, can be used to read the message.