We strongly encourage users to use Package manager for sharing their code on Libstock website, because it boosts your efficiency and leaves the end user with no room for error. [more info]

Rating:
Author: MIKROE
Last Updated: 2017-12-26
Package Version: 1.0.0.0
Example: 1.0.0.0
Category: Brushless
Downloaded: 2844 times
Not followed.
License: MIT license
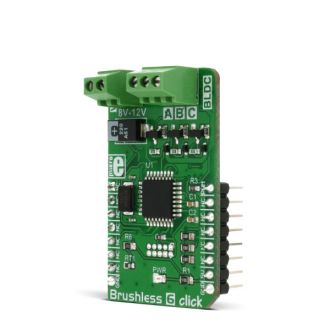
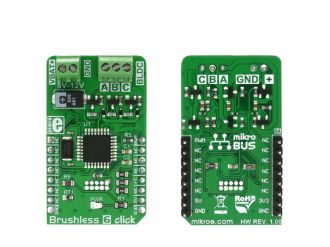
Brushless 6 click is designed to drive a three-phase sensorless, brushless motor, also known as the BLDC motor. The motor rotation is controlled by receiving driving commands via the incoming PWM signal.
Do you want to subscribe in order to receive notifications regarding "Brushless 6 click" changes.
Do you want to unsubscribe in order to stop receiving notifications regarding "Brushless 6 click" changes.
Do you want to report abuse regarding "Brushless 6 click".
| DOWNLOAD LINK | RELATED COMPILER | CONTAINS |
|---|---|---|
| 1513933559_brushless_6_clic_mikrobasic_arm.mpkg [163.40KB] | mikroBasic PRO for ARM |
|
| 1513933568_brushless_6_clic_mikrobasic_pic32.mpkg [150.14KB] | mikroBasic PRO for PIC32 |
|
| 1513933590_brushless_6_clic_mikroc_arm.mpkg [176.05KB] | mikroC PRO for ARM |
|
| 1513933604_brushless_6_clic_mikroc_pic32.mpkg [159.25KB] | mikroC PRO for PIC32 |
|
| 1513933620_brushless_6_clic_mikropascal_arm.mpkg [163.29KB] | mikroPascal PRO for ARM |
|
| 1513933636_brushless_6_clic_mikropascal_pic32.mpkg [150.05KB] | mikroPascal PRO for PIC32 |
|


Example description
The example demonstrates how to initialize and control a brushless motor using Brushless 6 click. The demo application is composed of two sections :
void applicationTask()
{
    brushless6_setMotor( _BRUSHLESS6_SPEED1 );
    UART_Write_Text( " Speed 1 ");
    UART_Write( 13 );
    UART_Write( 10 );
    Delay_ms( 1000 );

    brushless6_setMotor( _BRUSHLESS6_SPEED2 );
    UART_Write_Text( " Speed 2 ");
    UART_Write( 13 );
    UART_Write( 10 );
    Delay_ms( 1000 );

    brushless6_setMotor( _BRUSHLESS6_SPEED3 );
    UART_Write_Text( " Speed 3 ");
    UART_Write( 13 );
    UART_Write( 10 );
    Delay_ms( 1000 );

    brushless6_setMotor( _BRUSHLESS6_CCW );
    UART_Write_Text( " Direction Change ");
    UART_Write( 13 );
    UART_Write( 10 );
    Delay_ms( 1000 );

    brushless6_setMotor( _BRUSHLESS6_INIT );
    UART_Write_Text( " Stoped ");
    UART_Write( 13 );
    UART_Write( 10 );
    Delay_ms( 1000 );
}
Other MikroElektronika libraries used in the example:
Additional notes and information
Depending on the development board you are using, you may need USB UART click, USB UART 2 clickor RS232 click to connect to your PC, for development systems with no UART to USB interface available on the board. The terminal available in all MikroElektronika compilers, or any other terminal application of your choice, can be used to read the message.