
We strongly encourage users to use Package manager for sharing their code on Libstock website, because it boosts your efficiency and leaves the end user with no room for error. [more info]

Rating:
Author: MIKROE
Last Updated: 2019-05-10
Package Version: 1.0.0.0
mikroSDK Library: 1.0.0.0
Category: Capacitive
Downloaded: 2239 times
Not followed.
License: MIT license
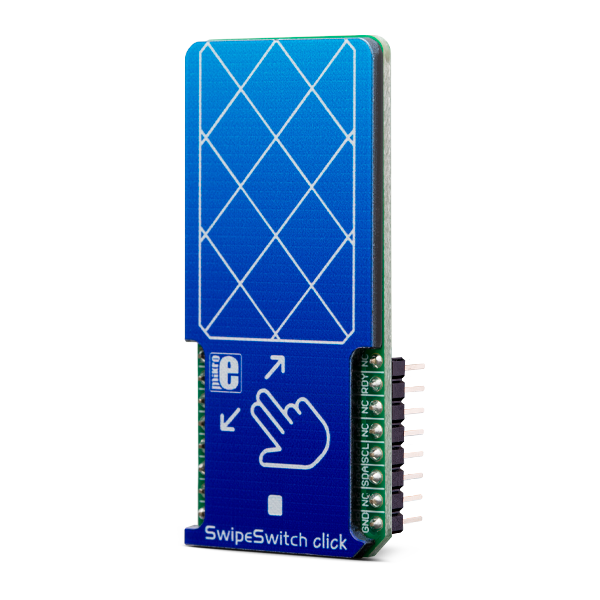
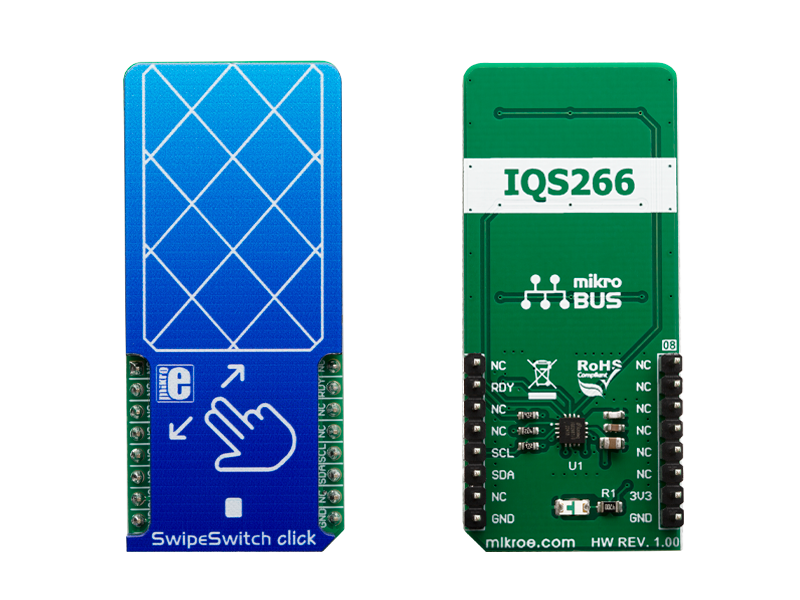
SwipeSwitch click is capacitive touch, gesture, and proximity sensing Click board, which is equipped with the IQS266, an integrated trackpad controller circuit which features ProxSense® and IQ Switch® technologies.
Do you want to subscribe in order to receive notifications regarding "SwipeSwitch click" changes.
Do you want to unsubscribe in order to stop receiving notifications regarding "SwipeSwitch click" changes.
Do you want to report abuse regarding "SwipeSwitch click".


Library Description
This library contains all the functions required to work with SwipeSwitch click.
Key functions:
void swipeswitch_init() - Function for initialization chip.void swipeswitch_goToEventMode() - Function for go to Event mode.uint8_t swipeswitch_waitForReady() - Function for checking RDY pins.Examples description
The application is composed of the three sections :
Note: After reading data or status registers, there is a certain time which must pass until the device is ready again. The device is ready for a new conversion and reading after the Ready pin is LOW.
void applicationTask()
{
    if(displayMode == 0)
    {
        while(swipeswitch_waitForReady() != 0);
        events = swipeswitch_readEvents();
        while(swipeswitch_waitForReady() != 0);
        gestures = swipeswitch_readGestures();

        if((events & (_SWIPESWITCH_EVENT_SWIPE)) != 0 )
        {
            if((gestures & _SWIPESWITCH_GESTURE_SWIPE_UP) != 0)
            {
                mikrobus_logWrite("SWIPE UP", _LOG_LINE);
            }
            if((gestures & _SWIPESWITCH_GESTURE_SWIPE_DOWN) != 0)
            {
                mikrobus_logWrite("SWIPE DOWN", _LOG_LINE);
            }
            if((gestures & _SWIPESWITCH_GESTURE_SWIPE_LEFT) != 0)
            {
                mikrobus_logWrite("SWIPE LEFT", _LOG_LINE);
            }
            if((gestures & _SWIPESWITCH_GESTURE_SWIPE_RIGHT) != 0)
            {
                mikrobus_logWrite("SWIPE RIGHT", _LOG_LINE);
            }
        }
        else if ((events & (_SWIPESWITCH_EVENT_TAP)) != 0)
        {
            mikrobus_logWrite("TAP", _LOG_LINE);
        }
    }
    else
    {
        while(swipeswitch_waitForReady() != 0);
        xCoordinate = swipeswitch_readXCoordinate();
        while(swipeswitch_waitForReady() != 0);
        yCoordinate = swipeswitch_readYCoordinate();

        if((xCoordinate != oldXCoordinate) || (yCoordinate != oldYCoordinate))
        {
            mikrobus_logWrite("Coordinate : (", _LOG_TEXT);
            IntToStr(xCoordinate, demoText);
            mikrobus_logWrite(demoText, _LOG_TEXT);
            mikrobus_logWrite(",", _LOG_TEXT);
            IntToStr(yCoordinate, demoText);
            mikrobus_logWrite(demoText, _LOG_TEXT);
            mikrobus_logWrite(")", _LOG_LINE);
            oldXCoordinate = xCoordinate;
            oldYCoordinate = yCoordinate;
        }
    }
    Delay_ms( 300 );
}
Other mikroE Libraries used in the example:
I2CAdditional notes and informations
Depending on the development board you are using, you may need USB UART click, USB UART 2 click or RS232 click to connect to your PC, for development systems with no UART to USB interface available on the board. The terminal available in all MikroElektronika compilers, or any other terminal application of your choice, can be used to read the message.


