
We strongly encourage users to use Package manager for sharing their code on Libstock website, because it boosts your efficiency and leaves the end user with no room for error. [more info]

Rating:
Author: Andrew Hazelden
Last Updated: 2016-02-17
Package Version: 1.0.0.0
Category: GPS
Downloaded: 985 times
Followed by: 3 users
License: MIT license
gps2udp is a script that connects a MikroElektronika GPS click board via USB to a Raspberry PI. The serial GPS data is pushed out through a UDP socket onto the network interface. The GPS is set to run at 115200 baud using the stty command.
Do you want to subscribe in order to receive notifications regarding "Using a GPS Click on a Raspberry Pi" changes.
Do you want to unsubscribe in order to stop receiving notifications regarding "Using a GPS Click on a Raspberry Pi" changes.
Do you want to report abuse regarding "Using a GPS Click on a Raspberry Pi".
| DOWNLOAD LINK | RELATED COMPILER | CONTAINS |
|---|---|---|
| 1391921276_using_a_gps_clic_other_arm.zip [452.87KB] | Other ARM Compilers |
|

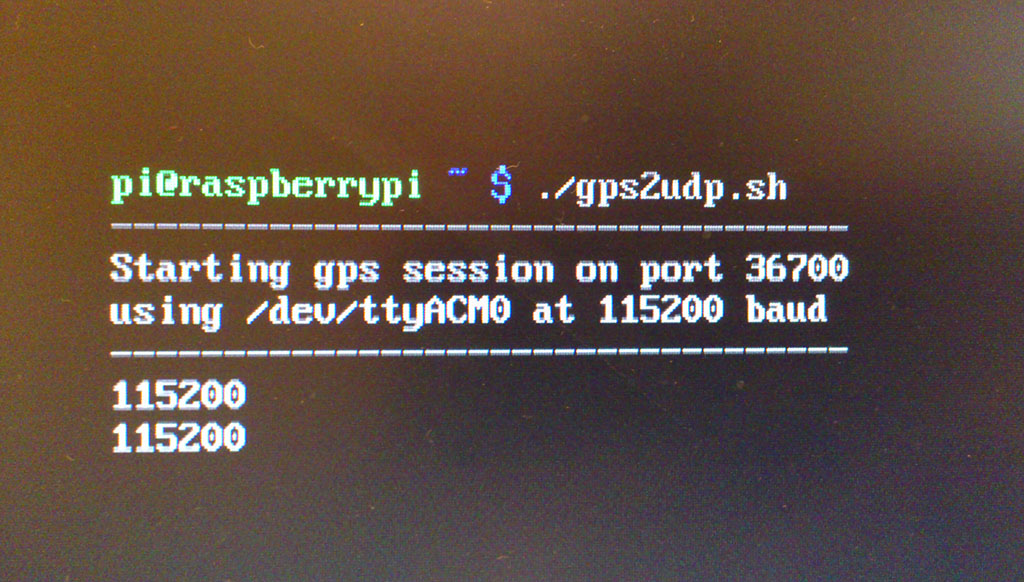
This is a screenshot showing a USB serial connection from a GPS Click board to a Raspberry Pi.
View full imageInstallation
Step 1. Install the supporting serial libraries on the Raspberry Pi:
sudo apt-get install setserial netcat screen
Step 2. Copy the script gps2udp.sh to your raspberry pi.
Step 3. Change the permissions on the gps2udp.sh script so it will run:
chmod 777 gps2udp.sh
Step 4. Start the script from the command prompt:
./gps2udp.sh

The gps2udp.sh script makes it simple to connect to the GPS Click board on Raspbian Linux.
View full imageConnecting to the UDP socket
Once you have started the gps2dps.sh script on the Raspberry Pi you can connect to the gps datastream using a UDP socket from any computer on your network.
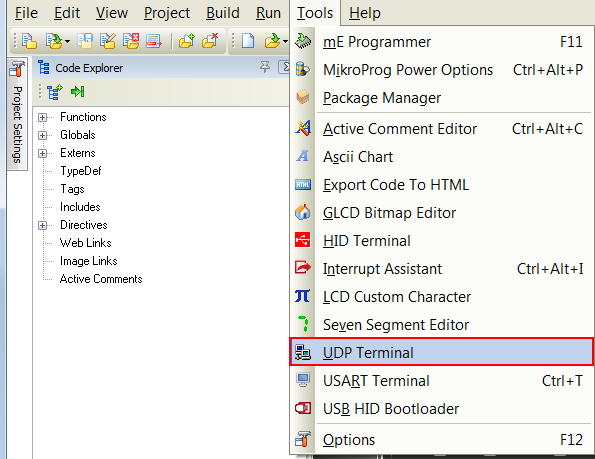
Viewing UDP data in mikroC
The easiest way to view a UDP datastream is to use the mikroC UDP terminal program. It is found in the Tools > UDP Terminal menu.

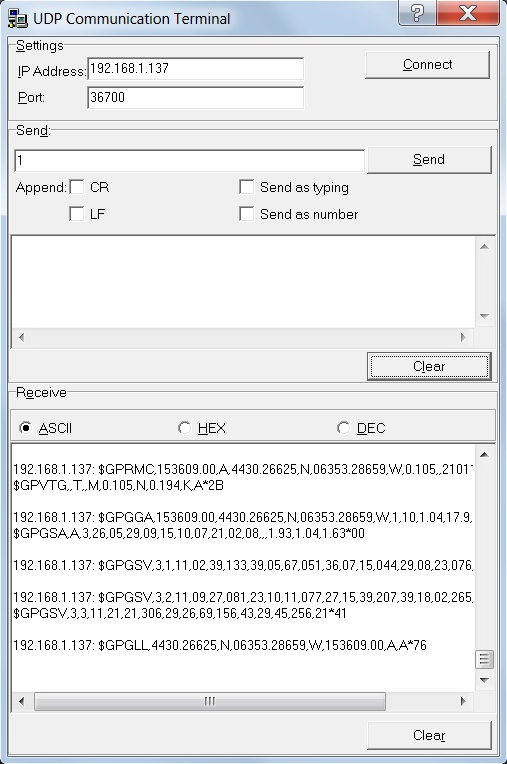
Start by typing in the ip address for the raspberry pi. In my case this is 192.168.1.137
Enter the port 36700 for the UDP connection.
To start the connection you need to send a bit of data over the UDP socket. Type "1" in the send text field and click the "send" button. GPS data should start flowing into the receive window.

You can connect to the Raspberry Pi using the UDP terminal.
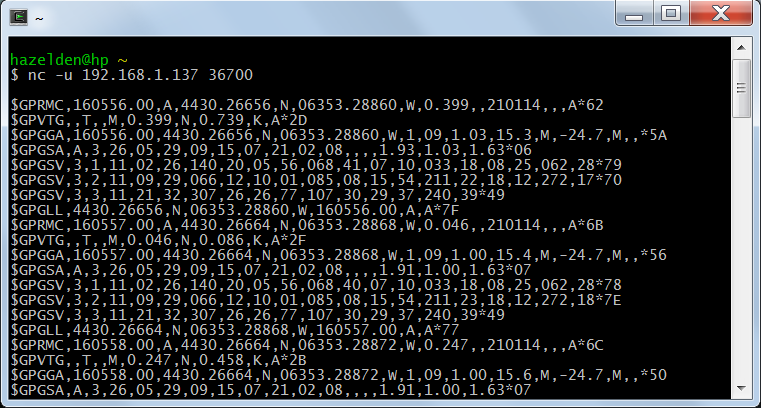
View full imageLinux/Mac/Cygwin Command Line You can also connect to the Raspberry PI hosted GPS click from your desktop system with a tool called netcat. Tip: You need to have the full-featured version of nc / netcat installed that supports UDP connections.

The Linux terminal window can be used to viewing the live UDP data too.
View full imageMy Raspberry Pi has an ip address of 192.168.1.137 and the UDP port is 36700.
To start the desktop connection to the Raspberry Pi hosted GPS click open the terminal and type in:
netcat -u 192.168.1.137 36700
or
nc -u 192.168.1.137 36700
Once the connection has been made you need to press the enter key once to start the UDP data flowing. When you are done you can close the network connection on the desktop by pressing Control-C.


