TOP Contributors

  1. MIKROE (2784 codes)
  2. Alcides Ramos (405 codes)
  3. Shawon Shahryiar (307 codes)
  4. jm_palomino (133 codes)
  5. Bugz Bensce (97 codes)
  6. S P (73 codes)
  7. dany (71 codes)
  8. MikroBUS.NET Team (35 codes)
  9. NART SCHINACKOW (34 codes)
  10. Armstrong Subero (27 codes)

Most Downloaded

  1. Timer Calculator (141339 times)
  2. FAT32 Library (74184 times)
  3. Network Ethernet Library (58761 times)
  4. USB Device Library (48850 times)
  5. Network WiFi Library (44560 times)
  6. FT800 Library (44146 times)
  7. GSM click (30881 times)
  8. mikroSDK (29724 times)
  9. PID Library (27368 times)
  10. microSD click (27306 times)
Libstock prefers package manager

Package Manager

We strongly encourage users to use Package manager for sharing their code on Libstock website, because it boosts your efficiency and leaves the end user with no room for error. [more info]

< Back
Example

Mikromedia VR Head Tilt Demo

Rating:

0

Author: Andrew Hazelden

Last Updated: 2016-02-22

Package Version: 1.0.0.0

Example: 1.0.0.0

Category: Gaming and Fun

Downloaded: 327 times

Followed by: 2 users

License: MIT license  

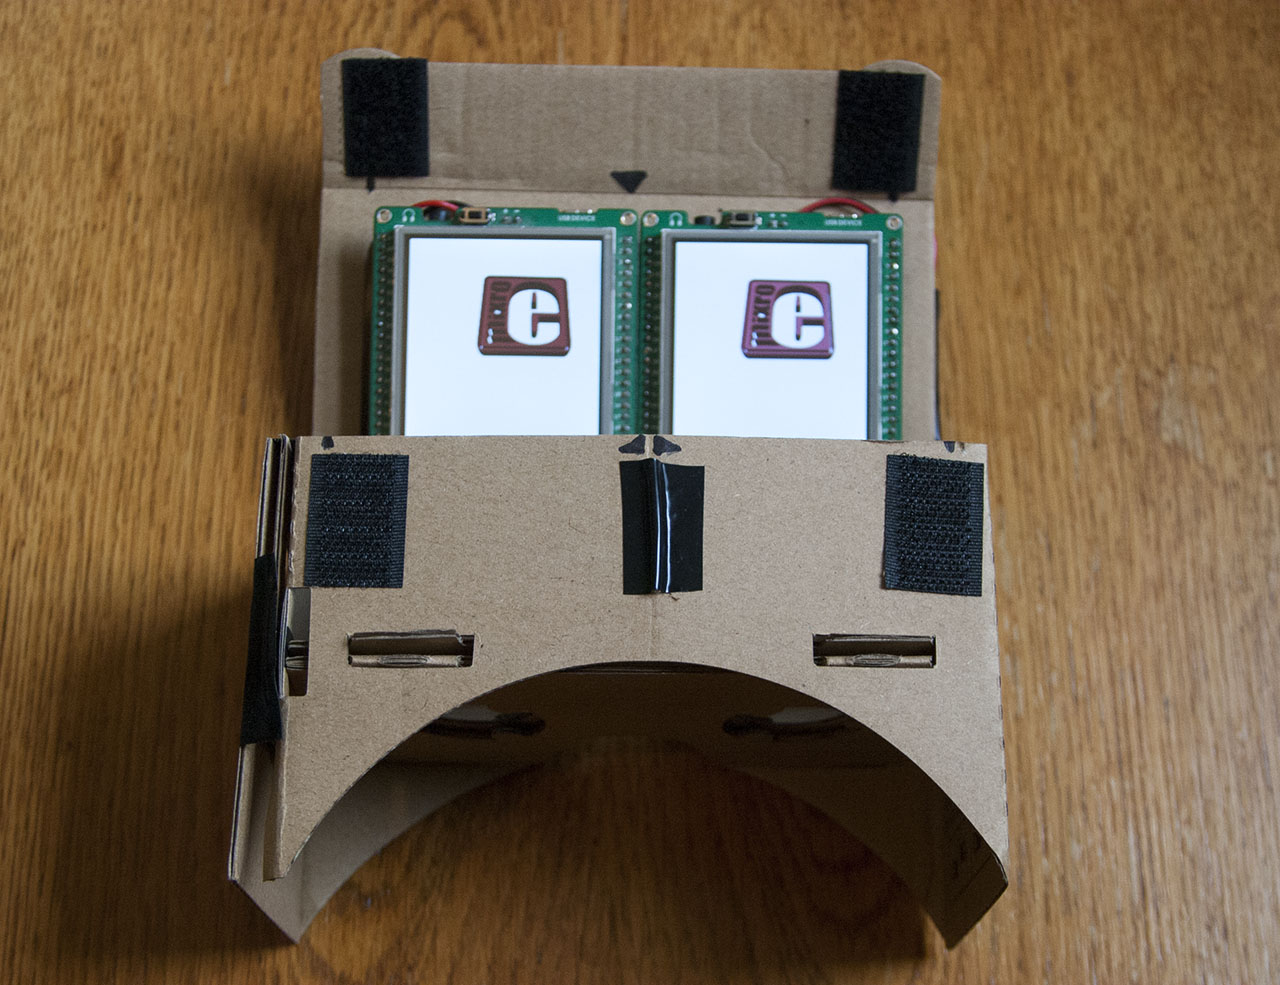
The demo uses a pair of Mikromedia boards and a Google Cardboard head mounted display to create a PIC32 microcontroller driven stereoscopic 3D view that responds interactively to the accelerometer sensor's tilt input. The code was written using MikroC Pro for PIC32 and VisualTFT.

No Abuse Reported

Do you want to subscribe in order to receive notifications regarding "Mikromedia VR Head Tilt Demo" changes.

Do you want to unsubscribe in order to stop receiving notifications regarding "Mikromedia VR Head Tilt Demo" changes.

Do you want to report abuse regarding "Mikromedia VR Head Tilt Demo".

  • Information
  • Comments (0)
DOWNLOAD LINK RELATED COMPILER CONTAINS
mikroC PRO for PIC32
  • lib
  • src
  • exa
  • hlp
  • hex
  • sch
  • pcb
  • doc

Example Blog

Two Mikromedia Displays in a Google Cardboard

Two Mikromedia Displays in a Google Cardboard

This is a screenshot of the two Mikromedia PIC32 displays mounted in a Google Cardboard head mounted display

View full image
Accelerometer Sensing

Accelerometer Sensing

The firmware reads the Mikromedia onboard accelerometer and then drives the display of a left or right rendered stereoscopic MikroE logo. As you tip your head up and down the logo will rotate in front of you. Click the View Full image link below to watch

View full image

Installation

  1. Install Firmware on a pair of Mikromedia PIC32 boards: Flash the left display firmware file tilt_left.hex to the left mounted Mikromedia, and the right display firmware file tilt_right.hex to the right mounted Mikromedia.
  2. Copy the tilt_res.RES resource files to the root folder of the MicroSD cards in the Mikromedia dev boards.
  3. Power up both of the Mikromedia boards and place them in the Google Cardboard display so they are aligned next to each other, centered at the left and right eye cardboard divider.
  4. Close up the Google Cardboard and start enjoying the PIC32 MCU powered VR experience. The Mikromedia board's accelerometer measures the forward tilt angle as you tip your head. Try looking down towards your feet and up to the sky to watch the iconic MikroE logo move in stereoscopic 3D.

Hardware Required


Two MikroMMB_for_PIC32_hw_rev_1.10
http://www.mikroe.com/mikromedia/pic32/


Google Cardboard Head Mounted Display
http://www.google.com/get/cardboard/    


ALSO FROM THIS AUTHOR

Snowburst Game

0

Tap to the screen to melt the falling snowflakes before you get snowed in. If you miss a snow flake the snowbank gets higher. Every 500 points the snowbank starts to melt a bit. You can play with two fingers but be sure to tap only one snowflake at a time. If you tap the status bar at the bottom of the screen you can mute the background music.

[Learn More]

Piezo Piano for Mikromedia Workstation PIC32

0

This is an example of a simple piano for the Mikromedia Workstation's Piezo Buzzer. Tap the keys on the Piezo Piano to play a tune. This example is compatible with the Mikromedia PIC32 board. The code was written using MikroC Pro for PIC32 and VisualTFT 2.71.

[Learn More]

Using a GPS Click on a Raspberry Pi

5

gps2udp is a script that connects a MikroElektronika GPS click board via USB to a Raspberry PI. The serial GPS data is pushed out through a UDP socket onto the network interface. The GPS is set to run at 115200 baud using the stty command.

[Learn More]