We strongly encourage users to use Package manager for sharing their code on Libstock website, because it boosts your efficiency and leaves the end user with no room for error. [more info]

Rating:
Author: MIKROE
Last Updated: 2019-06-06
Package Version: 1.0.0.1
mikroSDK Library: 1.0.0.0
Category: Temperature & humidity
Downloaded: 15335 times
Followed by: 2 users
License: MIT license
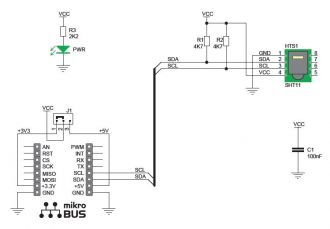
This code demonstrates how to use SHT1x click board in mikroBUS form factor. SHT11 sensor uses I2C communication and measures temperature and relative humidity.
Do you want to subscribe in order to receive notifications regarding "SHT1x click" changes.
Do you want to unsubscribe in order to stop receiving notifications regarding "SHT1x click" changes.
Do you want to report abuse regarding "SHT1x click".

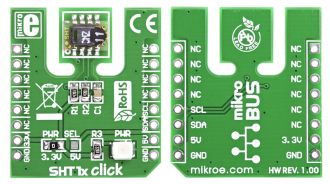
Front and back view of SHT1x click board designed in mikroBUS form factor. mikroBUS is specially designed pinout standard with SPI, I2C, Analog, UART, Interrupt, PWM, Reset and Power supply pins.
View full imageLibrary Description
The library covers all the necessary functions to control SHT1x click board. SHT1x click board
communicates with the target board through the SDA and SCL lines. This library offers functions
for seting and clearing and checking the state of SDA and SCL lines. It also has functions that
perform calculations of temperature and humidity based on counted ticks.
Key functions:
float sht1x_calcTemp( uint16_t t ) - Function is used to calculate temperature.float sht1x_calcHumi( uint16_t h, uint16_t t ) - Function is used to calculate humidity. Examples description
The application is composed of the three sections :
void applicationTask()
{
sht1x_readResults( &temperature, &humidity );
    mikrobus_logWrite( " Temperature: ", _LOG_TEXT );
    FloatToStr( temperature, logText );
    ltrim( logText );
    mikrobus_logWrite( logText, _LOG_TEXT );
    mikrobus_logWrite( degCel, _LOG_LINE );
    mikrobus_logWrite( " Humidity: ", _LOG_TEXT );
    FloatToStr( humidity, logText );
    ltrim( logText );
    mikrobus_logWrite( logText, _LOG_TEXT );
    mikrobus_logWrite( "%", _LOG_LINE );
    mikrobus_logWrite( "----------------------", _LOG_LINE );
    Delay_ms( 1000 );
}
Additional Functions :
Other mikroE Libraries used in the example:
UARTAdditional notes and informations
Depending on the development board you are using, you may need USB UART click, USB UART 2 click or RS232 click to connect to your PC, for development systems with no UART to USB interface available on the board. The terminal available in all MikroElektronika compilers, or any other terminal application of your choice, can be used to read the message.

Board is set to use 3.3V power supply by default. Solder PWR SEL SMD jumper to 5V position if used with 5V systems.
View full image