We strongly encourage users to use Package manager for sharing their code on Libstock website, because it boosts your efficiency and leaves the end user with no room for error. [more info]

Rating:
Author: MIKROE
Last Updated: 2018-06-29
Package Version: 1.0.0.0
mikroSDK Library: 1.0.0.0
Category: Motion
Downloaded: 5651 times
Not followed.
License: MIT license
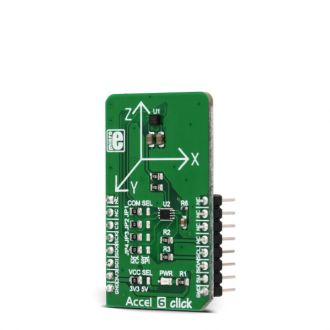
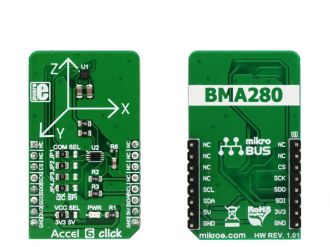
Accel 6 click is a three-axis acceleration sensor with many features. It uses the BMA280, a 14bit triaxial acceleration sensor with intelligent on-chip motion triggered interrupt controller, from Bosch Sensortec.
Do you want to subscribe in order to receive notifications regarding "Accel 6 click" changes.
Do you want to unsubscribe in order to stop receiving notifications regarding "Accel 6 click" changes.
Do you want to report abuse regarding "Accel 6 click".


Library Description
The library initializes and defines the I2C bus driver and drivers that offer a choice for writing data in the register. The library includes the function for reading the X/Y/Z axis data, orient chip, detect tap and slope on the chip and function for reading the temperature data. The user also has the function for initializes chip, set offset and software reset.
Key functions:
float accel6_getAxis(uint8_t axis) - Functions for reading the axis data.void accel6_getOrient(uint8_t *z_orient, uint8_t *xy_orient) - Functions for reading the orient.uint8_t accel6_getTapStatus() - Functions for detect tap on the x/y/z axis.Example description
The application is composed of three sections:
void applicationTask()
{
 mikrobus_logWrite(" X axis : ", _LOG_TEXT);
 fAxis = accel6_getAxis(_ACCEL6_AXIS_X);
 FloatToStr(fAxis, demoText);
 mikrobus_logWrite(demoText, _LOG_TEXT);
 mikrobus_logWrite(" mg ", _LOG_LINE);

 mikrobus_logWrite(" Y axis : ", _LOG_TEXT);
 fAxis = accel6_getAxis(_ACCEL6_AXIS_Y);
 FloatToStr(fAxis, demoText);
 mikrobus_logWrite(demoText, _LOG_TEXT);
 mikrobus_logWrite(" mg ", _LOG_LINE);

 mikrobus_logWrite(" Z axis : ", _LOG_TEXT);
 fAxis = accel6_getAxis(_ACCEL6_AXIS_Y);
 FloatToStr(fAxis, demoText);
 mikrobus_logWrite(demoText, _LOG_TEXT);
 mikrobus_logWrite(" mg ", _LOG_LINE);

 mikrobus_logWrite(" Temperature : ", _LOG_TEXT);
 Temp = accel6_getTemperature();
 FloatToStr(Temp, demoText);
 mikrobus_logWrite(demoText, _LOG_TEXT);
 mikrobus_logWrite(" C ", _LOG_LINE);

 accel6_getOrient(&z_orient[0], &xy_orient[0]);

 switch(z_orient[0])
 {
 case 1:
 {
 mikrobus_logWrite(" Z orient : UPWARD looking ", _LOG_LINE);
 break;
 }
 case 2:
 {
 mikrobus_logWrite(" Z orient : DOWNWARD looking ", _LOG_LINE);
 break;
 }
 default:
 {
 break;
 }
 }

 switch(xy_orient[0])
 {
 case 1:
 {
 mikrobus_logWrite(" XY orient : UPSIDE DOWN ", _LOG_LINE);
 break;
 }
 case 2:
 {
 mikrobus_logWrite(" XY orient : LANDSCAPE LEFT ", _LOG_LINE);
 break;
 }
 case 3:
 {
 mikrobus_logWrite(" XY orient : LANDSCAPE RIGHT ", _LOG_LINE);
 break;
 }
 case 4:
 {
 mikrobus_logWrite(" XY orient : UPRIGHT ", _LOG_LINE);
 break;
 }
 default:
 {
 break;
 }
 }

 tap_detect = accel6_getTapStatus();
 switch( tap_detect )
 {
 case 1:
 {
 mikrobus_logWrite(" Tap status : X negative ", _LOG_LINE);
 break;
 }
 case 2:
 {
 mikrobus_logWrite(" Tap status : Y negative ", _LOG_LINE);
 break;
 }
 case 3:
 {
 mikrobus_logWrite(" Tap status : Z negative ", _LOG_LINE);
 break;
 }
 case 4:
 {
 mikrobus_logWrite(" Tap status : X positive ", _LOG_LINE);
 break;
 }
 case 5:
 {
 mikrobus_logWrite(" Tap status : Y positive ", _LOG_LINE);
 break;
 }
 case 6:
 {
 mikrobus_logWrite(" Tap status : Z positive ", _LOG_LINE);
 break;
 }
 default:
 {
 break;
 }
 }

 mikrobus_logWrite(" ", _LOG_LINE);
 Delay_ms( 500 );
}
Other MikroElektronika libraries used in the example:
Additional notes and information
Depending on the development board you are using, you may need USB UART click, USB UART 2 click or RS232 click to connect to your PC, for development systems with no UART to USB interface available on the board. The terminal available in all MikroElektronika compilers, or any other terminal application of your choice, can be used to read the message.