
We strongly encourage users to use Package manager for sharing their code on Libstock website, because it boosts your efficiency and leaves the end user with no room for error. [more info]

Rating:
Author: Andrew Hazelden
Last Updated: 2014-10-22
Package Version: 1.0.0.0
Example: 1.0.0.0
Category: Gaming and Fun
Downloaded: 501 times
Followed by: 2 users
License: MIT license
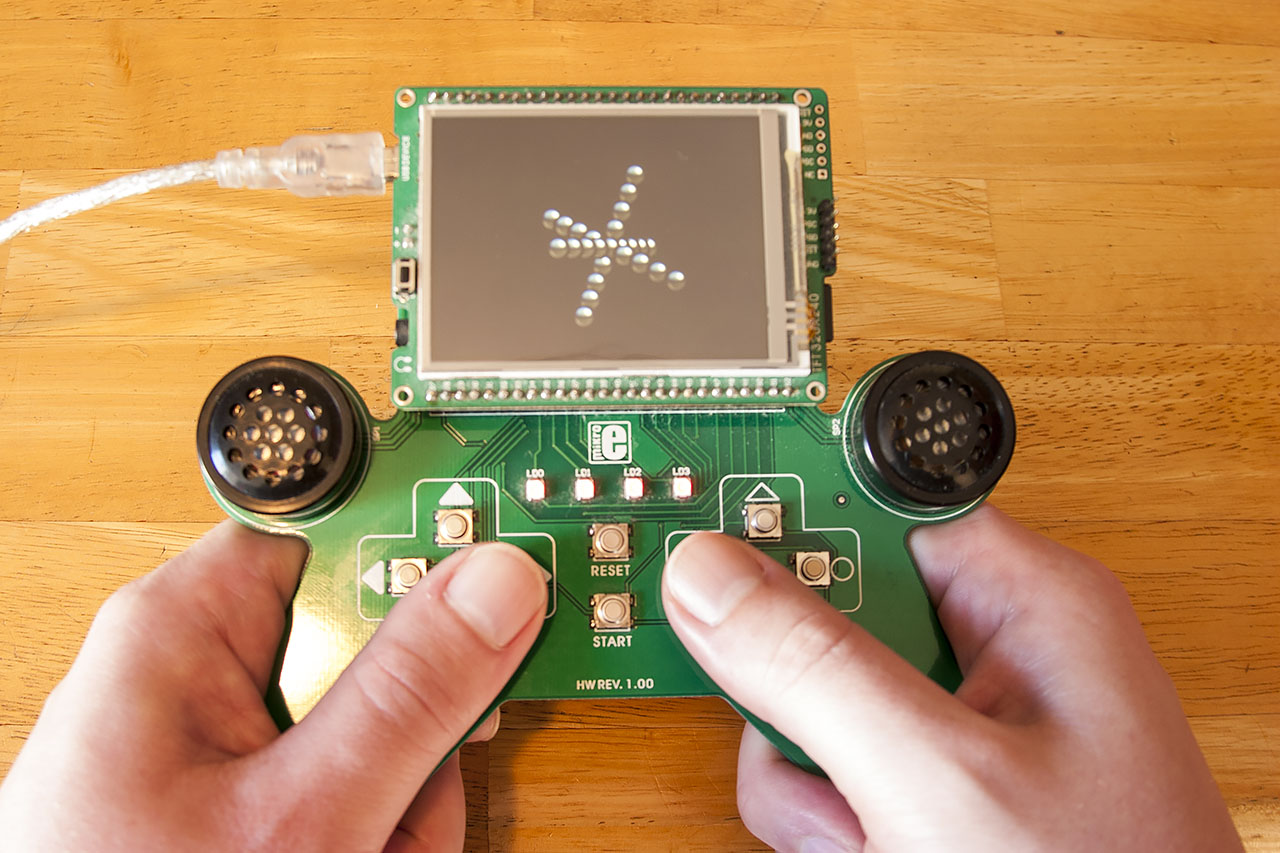
This firmware example uses the Libstock TFT Graphics library to render animated 3D Sprites on a Mikromedia PIC32 board. The demo can be controlled using the touch panel or the Mikromedia Gaming Shield.
Do you want to subscribe in order to receive notifications regarding "Mikromedia 3D Sprites" changes.
Do you want to unsubscribe in order to stop receiving notifications regarding "Mikromedia 3D Sprites" changes.
Do you want to report abuse regarding "Mikromedia 3D Sprites".
| DOWNLOAD LINK | RELATED COMPILER | CONTAINS |
|---|---|---|
| 1412613996_mikromedia_3d_sp_mikroc_pic32.zip [1.97MB] | mikroC PRO for PIC32 |
|
This example plots 3D sprites on a Mikromedia PIC32 screen using the TFT Graphics library. You can use the buttons on a MikroElektronika Mikromedia Gaming Shield to control the rotation of the shapes, and change the active model between a plane, jack, cube, pyramid, and a octahedron. The code was written using MikroC Pro for PIC32 and VisualTFT.
This example is based upon the classic 1990's Metal Basic sprite demo "TriCube" by Ivan Freyman.

You can control the 3D graphics using the Mikromedia Gaming Shield accessory.
View full image


User Input
Gaming Shield Controls:
Installation
Development Tools Used
Compatible SW:
mikroC PRO for PIC32
http://www.mikroe.com/mikroc/pic32/
VisualTFT
http://www.mikroe.com/eng/products/view/627/visual-tft/
TFT Graphics by Bitwise (required download)
http://www.libstock.com/projects/view/914/tft-graphics-library
Andrew Hazelden's Mikromedia Gaming Shield Library (included with the current source code)
http://www.libstock.com/projects/view/389/andrew-hazelden-s-mikromedia-gaming-shield-library
Hardware Required:
Dev.Board:
Mikromedia PIC32
http://www.mikroe.com/mikromedia/pic32/
Controller:
Mikromedia Gaming Shield
http://www.mikroe.com/mikromedia/shields/gaming/


