We strongly encourage users to use Package manager for sharing their code on Libstock website, because it boosts your efficiency and leaves the end user with no room for error. [more info]

Rating:
Author: MIKROE
Last Updated: 2018-02-14
Package Version: 1.0.0.0
mikroSDK Library: 1.0.0.0
Category: LED segment
Downloaded: 6971 times
Not followed.
License: MIT license
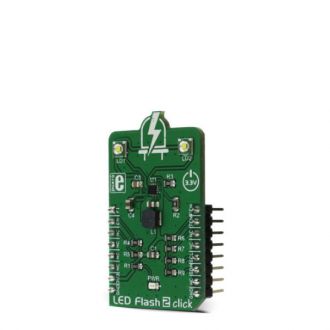
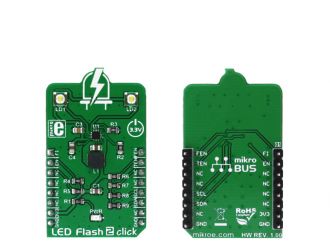
LED Flash 2 click is a powerful flash or torch click, featuring the MIC2870, a high-efficiency flash LED driver, optimized for driving one or two high-brightness camera flash LEDs. The MIC2870 IC can drive one high brightness LED up to 1.5A or two high brightness LEDs, up to 750mA each.
Do you want to subscribe in order to receive notifications regarding "LED Flash 2 click" changes.
Do you want to unsubscribe in order to stop receiving notifications regarding "LED Flash 2 click" changes.
Do you want to report abuse regarding "LED Flash 2 click".


Library Description
Library for LED Flash 2 click contains generic read / write functions. The library also contains control function (setMode), that can set click into any of the possible modes of operation, as well as a function that can toggle Flash inhibit pin on/off.
Besides the mode parameter used to set the working mode of the click, the LED current is also forwarded to the functions as the parameter by means of constants, that are named according to the percentage of the current they are used to set - e.g. _LEDFLASH2_CUR_100 will not scale down the current and it will be 100% of what is set by the current limiting resistors on the click board. When using the FLASH mode (_LEDFLASH2_MODE_FLASH), another function parameter (_LEDFLASH2_FTMR_312) is used and it represents the safety timer, after which the LEDs will get turned off, to prevent damage. Otherwise it can be set to 0.
Key functions
uint8_t ledflash2_readRegister(uint8_t regAddress) - Generic read register function
void ledflash2_writeRegister(uint8_t regAddress, uint8_t regData) - Generic write register function
ledflash2_setMode(_LEDFLASH2_MODE_FLASH, _LEDFLASH2_CUR_100, _LEDFLASH2_FTMR_312);- Sets the operation mode
void ledflash2_toggleFlashInhibit(uint8_t pinState) - Toggles the Flash inhibit pin on/off
Examples description
The application is composed of three sections:
System Initialization - Initializes pins, I2C peripheral, and logger.
Application Initialization - Initializes driver, and sets the click into "OFF"
Application Task - (Code snippet) This function will demonstrate how to use the flash mode, and the torch mode, with different power settings. It will then turn the click off
IMPORTANT NOTE: LED lights can be very bright, even with the lowest power settings. Avoid looking directly into the light, when working with the click.
    Delay_ms(1000);
    mikrobus_logWrite("Do not look directly into the led lights.", _LOG_LINE);
    mikrobus_logWrite("Triggering flash in 5...", _LOG_LINE);
    Delay_ms(1000);
    mikrobus_logWrite("4...", _LOG_LINE);
    Delay_ms(1000);
    mikrobus_logWrite("3...", _LOG_LINE);
    Delay_ms(1000);
    mikrobus_logWrite("2...", _LOG_LINE);
    Delay_ms(1000);
    mikrobus_logWrite("1...", _LOG_LINE);
    Delay_ms(1000);
    mikrobus_logWrite("Cheese!", _LOG_LINE);

    ledflash2_setMode(_LEDFLASH2_MODE_FLASH, _LEDFLASH2_CUR_100, _LEDFLASH2_FTMR_312);

    Delay_ms(350);
    ledflash2_setMode(_LEDFLASH2_MODE_OFF, 0, 0);
    Delay_ms(2000);
    mikrobus_logWrite("Switching to the torch mode in a moment...", _LOG_LINE);
    Delay_ms(2000);
    ledflash2_setMode(_LEDFLASH2_MODE_TORCH, _LEDFLASH2_CUR_100, 0);
    Delay_ms(5000);
    mikrobus_logWrite("Dimming the torch light...", _LOG_LINE);
    ledflash2_setMode(_LEDFLASH2_MODE_TORCH, _LEDFLASH2_CUR_18, 0);
    Delay_ms(5000);
    mikrobus_logWrite("Switching off...", _LOG_LINE);
    ledflash2_setMode(_LEDFLASH2_MODE_OFF, 0, 0);
Additional notes and information
Depending on the development board you are using, you may need USB UART click, USB UART 2 clickor RS232 click to connect to your PC, for development systems with no UART to USB interface available on the board. The terminal available in all MikroElektronika compilers, or any other terminal application of your choice, can be used to read the message.