We strongly encourage users to use Package manager for sharing their code on Libstock website, because it boosts your efficiency and leaves the end user with no room for error. [more info]

Rating:
Author: MIKROE
Last Updated: 2019-08-28
Package Version: 1.0.0.0
mikroSDK Library: 1.0.0.0
Category: Temperature & humidity
Downloaded: 3985 times
Not followed.
License: MIT license
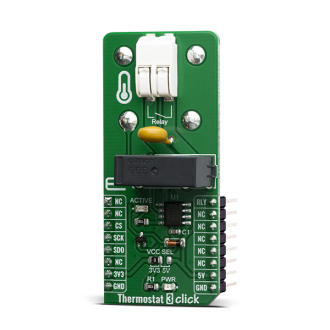
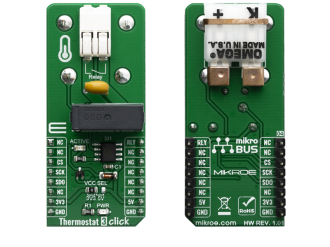
Thermostat 3 Click is a general-purpose thermostat Click board designed to be used with any temperature sensor based on the MAX31855 sensor design.
Do you want to subscribe in order to receive notifications regarding "Thermostat 3 click" changes.
Do you want to unsubscribe in order to stop receiving notifications regarding "Thermostat 3 click" changes.
Do you want to report abuse regarding "Thermostat 3 click".


Library Description
The library initializes and defines the SPI bus driver and drivers that offer a choice for read data form SPI lines. With functions from the library it is possible to read Internal or Thermocouple temperature data in Celsius, Kelvin or Fahrenheit. The library provides full relay control and reads fault error status.
Key functions:
float thermostat3_getInternalTemperature(uint8_t TempIn) - Junction (Internal) Temperaturefloat thermostat3_getThermocoupleTemperature(uint8_t TempIn) - Thermocouple Temperature (K probe)void thermostat3_relayControl(uint8_t relayPos) - Relay ControlExamples description
The application is composed of three sections :
void applicationTask()
{
    uint8_t dataReady_;
    char receivedData_;

    thermostat3_process();

    dataReady_ = UART_Rdy_Ptr();

    if (dataReady_ != 0)
    {
        receivedData_ = UART_Rd_Ptr();

        switch (receivedData_)
        {
            case 'i' :
            {
                InternalTemp = thermostat3_getInternalTemperature(_THERMOSTAT3_TEMP_IN_CELSIUS);

                FloatToStr(InternalTemp, demoText);
                mikrobus_logWrite("# Internal Temperature: ", _LOG_TEXT);
                mikrobus_logWrite(demoText, _LOG_LINE);
                break;
            }
            case 'e' :
            {
                ThermocoupleTemp = thermostat3_getThermocoupleTemperature(_THERMOSTAT3_TEMP_IN_CELSIUS);

                FloatToStr(ThermocoupleTemp, demoText);
                mikrobus_logWrite("# Thermocouple Temperature: ", _LOG_TEXT);
                mikrobus_logWrite(demoText, _LOG_LINE);
                break;
            }
            case 'r' :
            {
                if(_relayFlag == 1)
                {
                    _relayFlag = 0;
                    thermostat3_relayControl(_THERMOSTAT3_RELAY_OFF);
                    mikrobus_logWrite("# Relay OFF", _LOG_LINE);
                }
                else
                {
                    _relayFlag = 1;
                    thermostat3_relayControl(_THERMOSTAT3_RELAY_ON);
                    mikrobus_logWrite("# Relay ON", _LOG_LINE);
                }
                break;
            }
            case 'f' :
            {
                if(_faultFlag == 1)
                {
                    _faultFlag = 0;
                    mikrobus_logWrite("# Fault status -- OFF", _LOG_LINE);
                }
                else
                {
                    _faultFlag = 1;
                    mikrobus_logWrite("# Fault status -- ON", _LOG_LINE);
                }
                break;
            }
            case '+' :
            {
                if(_faultFlag == 1)
                {
                    _fError++;
                    if(_fError > 3)
                    {
                        _fError = 0;
                    }
                    _displayFault(_fError);
                    _faultStatus = thermostat3_getFaultData(0x01 << _fError);

                    if (_faultStatus == 1 )
                    {
                        mikrobus_logWrite(" -- ERROR", _LOG_LINE);
                    }
                    else
                    {
                        mikrobus_logWrite(" -- OK", _LOG_LINE);
                    }
                }
                else
                {
                    mikrobus_logWrite(" Fault status is OFF, Please turn ON fault status!!!", _LOG_LINE);
                }
                break;
            }
        }
    }
}
Additional Functions :
The full application code, and ready to use projects can be found on our LibStock page.
Other mikroE Libraries used in the example:
Additional notes and informations
Depending on the development board you are using, you may need USB UART click, USB UART 2 click or RS232 click to connect to your PC, for development systems with no UART to USB interface available on the board. The terminal available in all MikroElektronika compilers, or any other terminal application of your choice, can be used to read the message.